ENJOY KNIGHT
Gameplay
- Inventory
- Hunting
- Trading
- Merchanting
- Party
- Friends
- Skills/Stat Points
- Item Upgrade
- Warehouse
- Mail (Message)
- Pet (Familiar)
- Repurchase System
- Rebirth System
- Achievement System
Inventory [I]
 If you pick up items while hunting, you can check them in your inventory window.
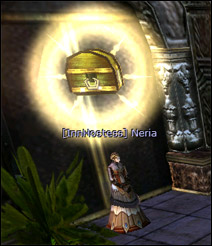
Inn Hostess Window
 You can go to the Inn Hostess to store items and Noah. The Window appears by right clicking the NPC.
* You can purchase cash items by clicking Power Up Store.
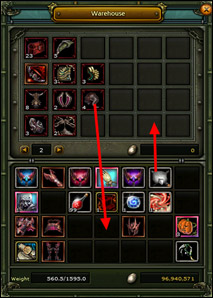
Warehouse Window
 Warehouse opens once you click "Use Storage" . (Warehouse area is at the top and your own inventory at the bottom.)
The usage is similar to trading; drag and drop. If you click the Noah image, you can decide how much you want to store in the Warehouse. At that time, please insert the amount and click confirm in order to store. Then, close the window.
* Warehouse is shared by your account characters on each server.
Monster Information
While hunting monsters, EXP is gained by comparing the level of monsters and the user. If the monster level is higher than the user, bonus EXP will be received. If the monster level is lower or similar to the users level, then the player receives no EXP.
Monster Targeting
 If you click target monster (Shortcut key Q and Z), target will be selected and monster target sign appears on the top.
Hunt monsters
Activates Auto-attack mode by double-clicking the monster or pressing 'R' key after choosing the target.
Pickup items from monsters
Check dropped items by clicking on the dead monster and then click again to put the items into your own inventory.
Trade with NPCs
You can find Merchant by typing a command "/town" on Chat Window. Once you right-click the Merchant, trading window appears. Choose "I want to trade" to open 'Item Window'. You can purchase the item by drag and drop method.

- Go to Merchant and set him as a target.
- If you right-click on him, window appears while he is looking at you.
- You can trade by selecting "I want to trade".
- You can check what he sells on trade window.
- If you mouse over icon you want to get, information appears by tool-tip.
-
After you select the item you want, please drag and drop it into your inventory.
- Noah deducts automatically if you purchase any item.
- Windows to insert number appears if the item can be purchased in quantities.
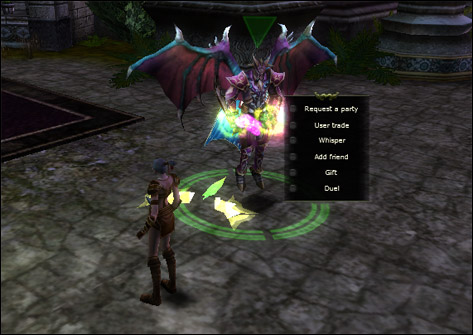
Trade with Players

- Click a user you want to trade with and type "/trade" in the chat window.
- Awaiting window appears while the user responds.
- If the user accepts, the trade window appears.
- Your own warehouse is located at the bottom of the transaction window, the area to put the trade items on is the top one. (Your own area is on the left.)
- To put trade item, drag the item from own area to the top area. (You cannot revise the item after registered on the window. So, please choose carefully. You can cancel the trade once you put wrong item.)
- Check what the user puts on the window and click 'Trade' button.
- Transaction completed once both press 'Trade' button.
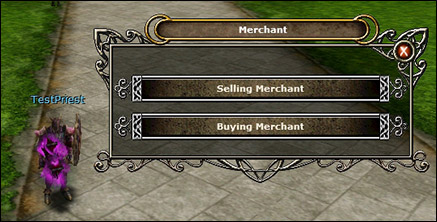
Merchanting
-
You can sell inventory items by entering "/Merchant" command.
-
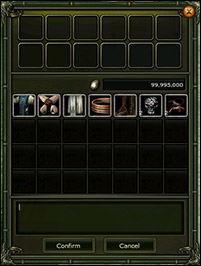
Put items you want to sell on the top slots.
-
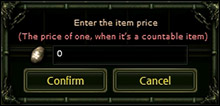
You can set the price and number of the item if needed.
-
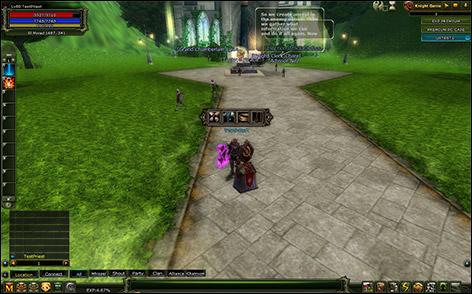
If you make a comment on the message windows below, coordinates and comment are shouted every 3 minutes automatically.
-
Selecting a character that is on trading mode will allow you to see his selling list by right clicking. Purchasing an item is the same as a normal store, drag the item to your inventory.
-
The price appears at the bottom of the item description.
* Please check the price carefully. (Please be careful of cheating such as input 1,000 instead of right price '100'.) - You can sell up to 12 types of items.
- Trading mode is cancelled if you work on other things while trading.
- Only the 4 items at the top-right appear to buyer, the other 8 items appear once the trading window is opened.
-
The price appears at the bottom of the item description.


Party System
You can enjoy the 'Party System' by gathering the power of other users and hunting together in Knight Online. You can enjoy the game more and expect a faster leveling.
Requirements
You can create a party with players that are less or more than 8 levels to your own.
Even the party member matches the first requirement, if the level of other players is within 1.5 multiplied or divided by your own level, you can compose the party.
-
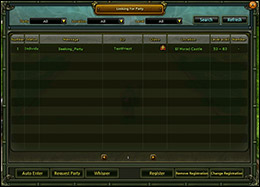
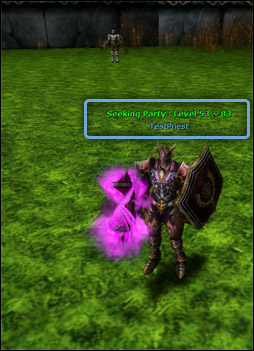
If you insert "/Seeking Party" on the chat window, your request will be updated on the Party board in look for party members, and a message showing 'Seeking Party' will appear on top of your character name.
-
Click the user you want to invite to your party, and click on the ‘Invite Party' button to wait for a response from the user.
-
If the user accepts the invitation, then party screen appears on the right of your screen.
-
To withdraw from a party, you either type "/Withdraw Party" or press the [X] button on the party screen.


Add Friends
-
Right-click on the character and then click on 'Add friend'.
-
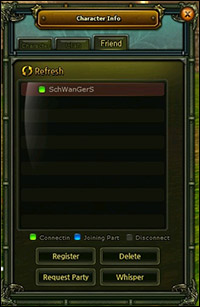
Select friend once character screen appears.
-
 Delete from the friend list.
-
 Whispering opens automatically if you click and press the user on the friends list and press the button.
-
 You are able to request a party if you click a user on your friends list and click on the button to do so.
-
 Update friend list.
-


 Delete from the friend list.
 Whispering opens automatically if you click and press the user on the friends list and press the button.
 You are able to request a party if you click a user on your friends list and click on the button to do so.
 Update friend list.
Skills

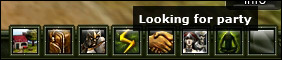
- Skill window appears by clicking the shortcut key 'K' or clicking the skill button below.
- You can check the skills from the window. You will gain skill points from Lv.10 and you can distribute them on the skill tree.
- You can register the skills on the skillbar by right-clicking on the skill or dragging and dropping it on the skill bar.
-
How to use skill
- Mouse Usage: Click the skill you want to use with the mouse.
- Keyboard Usage: Press skill number you want to use. (Number 1 from the top and the next is number 2.)
-
Skill Page Move
- Mouse Usage: You can move to the next short-cut page by pressing the down arrow.
- Keyboard Usage: You can move by pressing Page Up and Page Down.
Stat Points
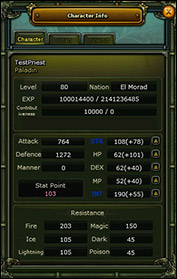
- You receive 3 Stat points per level up. These points are important as they determine your character build and it is recommended to invest them properly per class.
- Stat Points should be distributed according to the item you want to equip since each item has different Stat Point requirements.

| Stats | Descriptions |
|---|---|
| Strength | Important for Warrior and Priest Classes. Increases attack power of melee attacks and maximum encumbrance (not counting arrows, knifes etc). |
| Health Point | Increase max HP for all characters. |
| Dexterity | Important for Archer and Assassin Classes. Increase the success rate of attacks and the attack power of arrows, knifes etc. |
| Magic Power | Increase pure magic damage. |
| Intelligence | Important for Mage and Priest Classes. Increases max MP. |
Item Upgrade
 If you click ' Magic anvil' next to ' Charon' at Moradon, Window for item upgrade appears. The upgrade starts after right-clicking item and scroll, then clicking 'OK'.
 If you click 'Preview', You can preview an ability when item upgrade succeeds.
Regular upgrade item (Low, Middle and High Class) and Unique items are available for upgrade.
Scroll can be used only once and impossible for duplicated usage. (Exclude item upgrade scroll)
Weapon Upgrade
- Upgrade Scroll
- It increases weapon's ability such as attack and damage attributes with certain probability. You can upgrade it up to Lv.10 but items may be destroyed with certain probability.
- Reduce Scroll
- Reduces item attributes and decreases the ability require to use them. Users can use it only once regardless of item grade.
Items with reduced grade are upgradeable but cannot be changed to another attribute. The item may be destroyed with certain probability. - Elemental Scroll
- It gives additional Elemental damage to the item. The additional damage has Fire, Glacier, Light or Poison elemental attributes. Users can only use it once regardless of the item grade. Items with Elemental attributes can be upgraded but the attributes cannot be changed again. The item may be destroyed with certain probability. It changes unique items upgrade usage with a 100% probability.
- Dispell Scroll
- It changes Staff with Light attribute by Elemental to Fire and Glacier attribute with 100% probability.
Created Attributes on Weapons when Elemental Spell is Used
There are 4 damage attributes if upgraded with the Elemental Spell, Fire, Glacier, Light and Poison. Normal upgrade items starts at +8, Unique items start at +6, additionally the attribute effects show when it converts to a Rebirth item.

Armor Upgrade
- Upgrade Scroll
- It upgrades the level of armor and increases defense, bonus stat points, Resistance Bonuses with a certain probability. You are able to upgrade it up to Lv. 10 and items may be destroyed with a certain probability.
- Enchant Scroll
- It gives Stat Point attributes (Strength, Dexterity, Health, Intelligence, Magic Power) on armor and then increases Stat Bonus Points. You can use only once regardless of armor level, and the item may be destroyed with a certain probability.
- Immune Scroll
- It gives Immune attribute and then increase Resistance bonus. You can use it only once regardless of armor level, and the item may be destroyed with certain probability.
- Reduce Scroll
- It gives Reduced attributes, and then decreases ability required to use the item. You can use it only once regardless of item level. You can upgrade the item with reduced attributes, but the other attributes cannot be changed. The item may be destroyed with a certain probability.
What is Rebirth Item Upgrade System?
Similar to the name, the rebirth item becomes a brand new one. It is a system to departmentalize upgrade level to +7, +8... If you change your item to rebirth, it will change to a relevant leveled item from a normal upgraded item.
 * How to change/upgrade Rebirth item
Converting an item to Rebirth is done by inserting a Rebirth Scroll at the Anvil and upgrading it. The way to upgrade it is similar to the normal item upgrade, and it is done with the 'Rebirth Item Strengthen Scroll'. (Item converted to Rebirth Item: Above +7 Blessed Enchant Upgrade item, Above +7 unique item.)
* How to change/upgrade Rebirth item
Converting an item to Rebirth is done by inserting a Rebirth Scroll at the Anvil and upgrading it. The way to upgrade it is similar to the normal item upgrade, and it is done with the 'Rebirth Item Strengthen Scroll'. (Item converted to Rebirth Item: Above +7 Blessed Enchant Upgrade item, Above +7 unique item.)
Warehouse
- Inn Host/Hostess can be found in all town areas. These NPCs can store items from your inventory to keep it from getting too full and allows you to access your goods from any zone in the game.
- All characters on the same server within the same account share the same warehouse for storage.
- Items without storage restrictions can be moved freely to and from the warehouse by simply dragging and dropping.
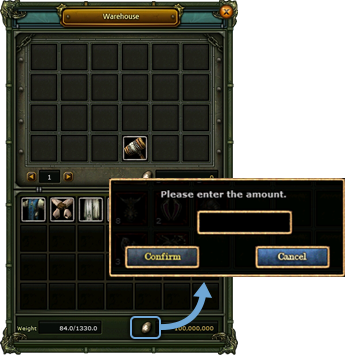
- Noah can also be stored in the warehouse. This can be done simply by clicking the Noah symbol below your inventory, entering in the desired amount to be stored, and clicking the Confirm button.


How to Use VIP Vault
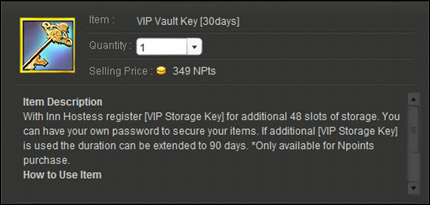
- The game’s VIP Vault can also be accessed via the Inn Host/Hostess NPC. Use of the VIP Vault can be obtained by purchasing a VIP Vault Key from the Power Up Store.
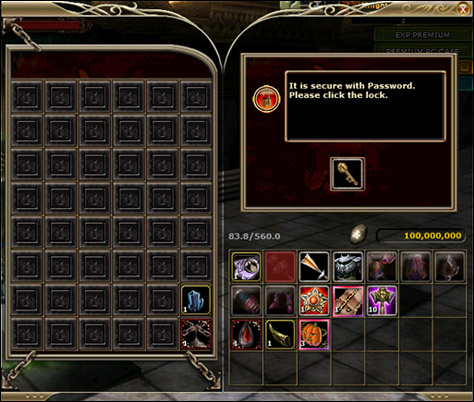
- Once the VIP Vault Key is obtained, drag it from your inventory to the keyhole, set your password, and store your items securely. This will lock your precious items in a password protected vault in case someone gains access to your account.
- The VIP Vault Key is good for 30 days. If you have items remaining in the vault after the key expires, they will be returned to your inventory.


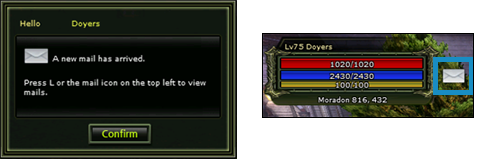
Mail Service
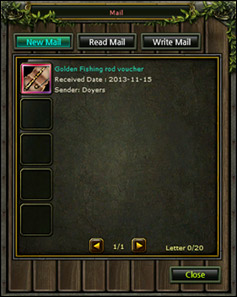
- Your in-game mailbox can be accessed by pressing the L key. The in-game mail system is very similar to the standard e-mail which is sent between the game characters. Players are charged 1,000 Noah as postage to send an in-game mail message.
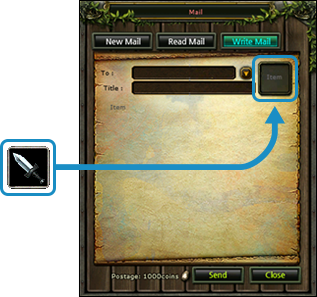
- In-game mail is also used to deliver items such as Premiums and items bundled with Premiums. Some items may also be attached to in-game mail to be sent between players.
- The Mailbox can store up to 20 messages. Messages left in the inbox will be deleted after 7 days.


Pet (Familiar)

What is Familiar
Deriving from the meaning of "familiar", pets are called Familiars – just like how you should be familiar with your pet.
Familiar Creation
- How to obtain a Familiar
-
When You reach Level 10 the Moradon's [Familiar Trainer] Kate will give you a quest that will allow you to obtain your familiar.
- Hatching
-
You must hatch Kaul Egg to obtain your own familiar.

- Summoning
-
Once the Egg is hatched, equip the Familiar and summon it.
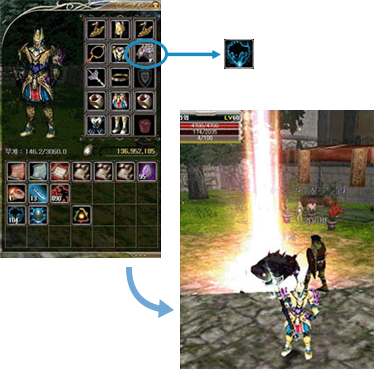
- How to use Familiar
-
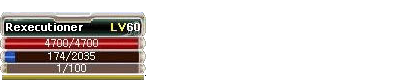
Once the Familiar is summoned, there's a status bar and quick slot window.
-
The short cut key for a familiar is "P" and there'll be 3 different menus: Ability, Items and Skills.
-
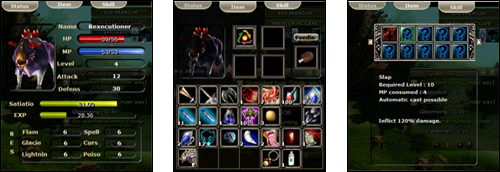
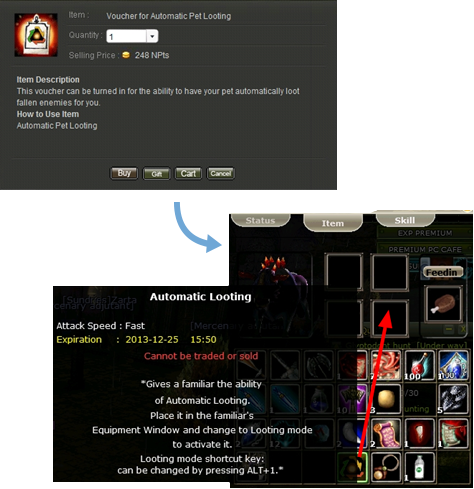
Familiars Abilities
The Status tab shows your Familiar's basic stats (HP, MP, level, EXP, etc.). -
Familiar's Item
The Item tab shows your inventory and allows you to equip items to your Familiar and use their skill bar. You are also able to feed your Familiar from this tab. -
Familiar's Skill
As your Familiar levels up, it will learn additional skills that will be displayed in the Skill tab.
-
Familiars Abilities
- Features
-
Auto Looting: Set your familiar's mode to Looting mode then it'll start auto-looting. (Only when the familiar is equipped with the auto-looting item).
- Familiar Words: Depending on what's being input for the chatting window, familiar responds and as it levels up, more words will be recognized by familiar.
-
Familiar Transformation: Using the Familiar Transformation Scroll, you can change your familiar's appearance.
There are L, M, H levels of scrolls and depending on the level of the scroll you are using, the appearance of your pet changes.


Repurchase System
Once you sell your items to NPCs or you destroyed items belonged to you, within 3 days you can repurchase them with in-game currency, Noah.
 * Restrictions: Functional Items like Potions and Scrolls cannot be repurchased, and the limit of repurchasing item is 20.
What is Rebirth?
Permission of Rebirth is offered to all characters who achieve level 83 status with 100% EXP. After passing the qualification test, you can make your character stronger by using the bonus points.
Rebirth Process
- Conduct 3 quests from NPC [Fortune Reader] Mackin at Moradon Castle.
- When all quests are completed, you will receive the [Rebirth Permit] item as a reward.
- Redeem the [Rebirth Permit] item with the NPC [Fortune Reader] Mekin and distribute the Rebirth points to the abilities you desire to improve. The Rebirth process is then complete.
| Mission | Content | Requirements |
|---|---|---|
| Proof 1: Proof of EXP | Prove your EXP with the highest level | 100% EXP w/ Level 83 |
| Proof 2: Proof of Wealth | Prove your Wealth | 1 Gold Bar |
| Proof 3: Proof of Honor | Prove your contribution to the nation | 10,000 Contribution |
Effect of Rebirth
- When you complete Rebirth, the level will remain as 83 but EXP will be initialized to 0.
- When the character dies there is a reduction in the level and EXP, but it doesn't affect the Rebirth level or points.
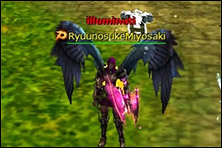
- After Rebirth, the Rebirth symbol will appear above the character's name.
| List | Content |
|---|---|
| Ability | +2 Rebirth point is given to each time |
| Rebirth Ability | When EXP is 100% at level 83, Rebirth is available up to 5 stages (EXP bar will be shown in purple after Rebirth) |
| Quest Reset | All quests are initialized. You can start all missions again (Excluding the quests of Saving the Servant, Bilbor's gift, Previous Job, Skill, New Partner) |
- Rebirth Level; The Rebirth Level is displayed right of the character's level (level 83 / stage 1)
- Rebirth Points: Shown in parenthesis next to the stat points. The figure shows it gained +62 Rebirth Points.
- Rebirth Symbol: Appears above the character's name.

Achievement System
The Achievement System Window is now available. Go to the main menu and select 'Achieve' or type the command [/Achieve] in the chat window.

Reward for Achievements
- Gain a Title.
- Gain Achievement points.
- Gain an item: Some achievements will reward the player with items. The item can be collected from the Achievement window after completing the necessary achievement.
Title
- You can develop the character's title and ability.
- A title can improve a character's ability when certain achievements are completed or when a certain number of achievement points are fulfilled.
- You can modify your character's ability and title using the 'Achieve' tab in the Character Info window (Shortcut key: U).
